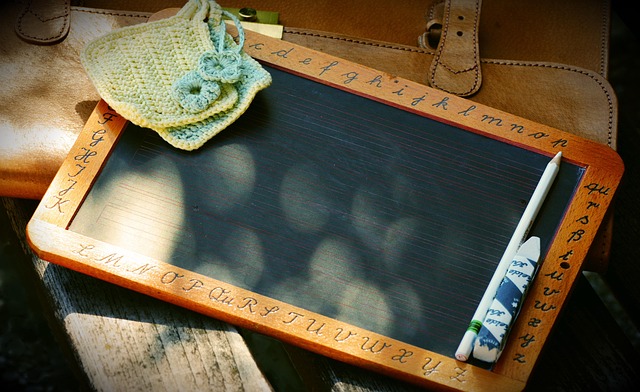
- Posts for Home category
Bedroom Renovation Part 2 | Our Prairie Nest
Bedroom Renovations: Part 2

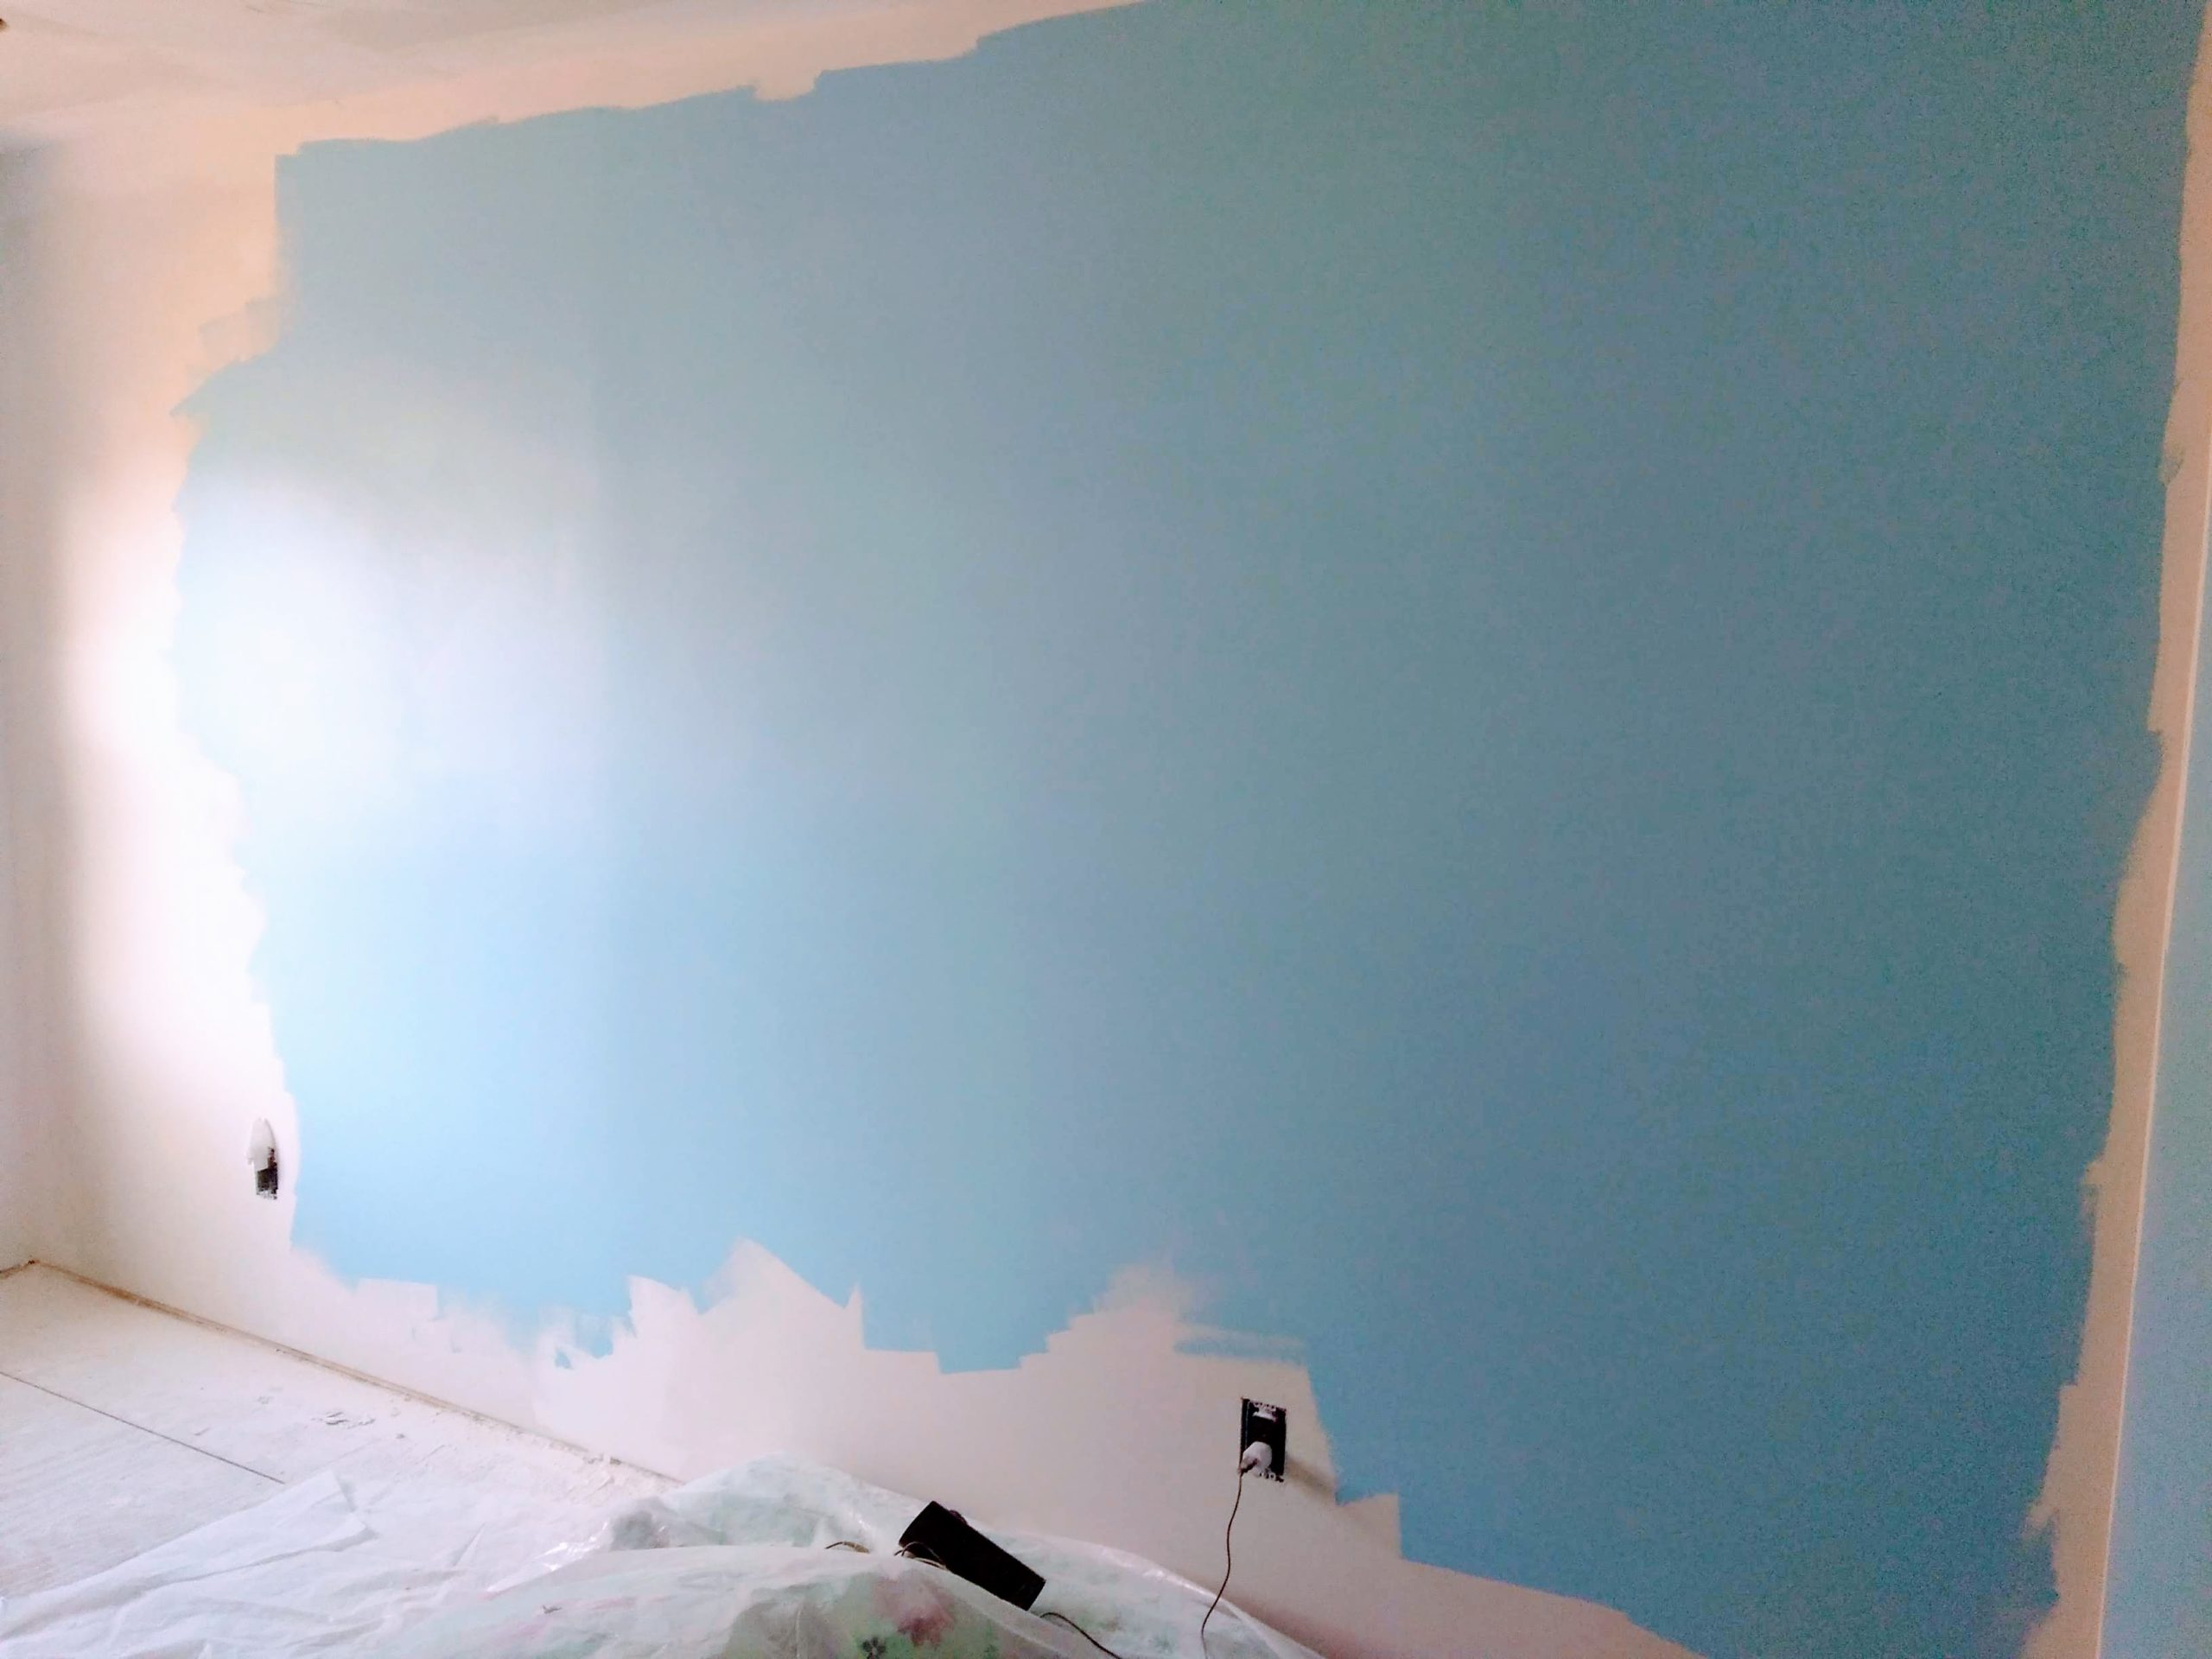
With the first two bedrooms gutted, we started the process of renovating them. First, we installed new wiring and recessed lighting cans. After the county inspector gave the electrical work the green light (which is easy to get when you do it right), we added modern insulation for both the ceiling and walls. Finally, we hung the plastic that holds the ceiling insulation in place. One thing I forgot to mention in part 1 is that my husband also goes through the process of strengthening all the ceiling joists. It’s a lot of work, but lifts and reinforces a previously sagging ceiling.

Ceiling drywall goes up next! That’s exciting, because it signals the next phase of the renovation – turning what looks like a construction site into an actual room.

Covering the insulation is one of my favorite moments of this entire process. It takes a few days to get all the drywall up on the ceiling and wall studs. Once it’s on there, we get into the process of taping, mudding and sanding. This is where the excitement fades, because drywall dust is insidious stuff. It gets everywhere and it never seems to end!

When that messy part was done, we installed new doors on each bedroom. The old layout had the doors facing each other. Those doors were as thin as the walls. You could easily put a fist through them.

We replaced the hollow core doors with solid core oak doors and stained them dark. Hanging the doors was a frustrating process, but once it was done, we were ready to paint! Our room got a pale green color called “Lime Taffy.” Paired with the door and dark brown curtains, it looks like a bowl of mint chocolate chip ice cream.

Our daughter’s room got a sky blue called “Windsor Way” at her request. The original picture makes it look a little more Robin’s egg, but it’s much softer and less green than the lighting appears to show.

Bedroom Renovation Part 2 | Our Prairie Nest

Once the rooms were painted, it was time for flooring. This was an adventure. The flooring we chose for our living room – “Smokey Topaz” made by Great Lakes Wood Floors – was discontinued. Our local Menards didn’t have any and they don’t place orders to for inventory from other stores. We looked at our options and decided to buy out all 26 boxes available at the nearest store… in Sioux Falls, South Dakota.

This took into consideration the leftover flooring we had in our home from doing our living room, the need for 20 boxes to do both bedrooms and the hall, plus the eventual need for more flooring to do the third bedroom.

Neither of us was excited about the idea of a 7-hour round trip to haul a truck full of flooring, but that’s what we did. It turned out to be the best decision for a number of reasons, both practical and personal. After a triumphant road trip, we let the flooring sit in the house for a few days to acclimate and then it was time to install it.

Once we completed the hall and first two bedrooms, and went into the third bedroom, we found we had enough to complete that one, as well. We aren’t doing the third bedroom yet, but it’s good to know we have enough flooring to finish the house.

The discontinued flooring led to the question of what we would do with the dining room floors. That was easy to determine. The dining room will get the same flooring as the kitchen, whatever we choose. That flooring will also go into the addition, since it will function as a partial mudroom and laundry room.

With the flooring in place, we had paint touch-ups, trim, outlet and switchplate covers, and other random bits to do! We also replaced the in-floor heating/cooling vents with the ones that go against the wall, instead. First of all, it looks nicer. Second, it’s more practical. We’re less likely to drop small things, like tiny Legos, down an angled vent than a floor one! The finishing bits should be done by the end of May and we are so glad this part of the renovation is nearly complete.

Besides final photos to come, what’s next? We have to wait about 3 years for the next phase in our renovation process, because it’s the addition. We need to save money. We don’t want to start the addition and do it in pieces. Leaving it uncovered (no roof, no housewrap, etc.) and open to the elements is an awful idea.

The addition will replace the back deck. It will include a storm cellar, since we don’t have a basement. The room will function as my office, as well as have a separate laundry room and mudroom/entry. I’m excited about this, because we will also update the exterior of the house in this phase.

Our house only has studs, a layer of old siding, and a layer of new siding on top. No plywood and no housewrap between the studs and siding! Fixing that and replacing the grungy white siding with the wheat color used on the workshop is going to be fun. I love installing siding. It’s like putting together a puzzle. Modernizing the exterior with plywood and housewrap will also make the house that much more energy efficient.

The workshop siding – looking forward to the house exterior matching it!

After that, we’re left with the most expensive parts to tackle: the bathroom and third bedroom at the same time, which includes the water heater and furnace, and then the kitchen and dining room. Moving the washer and dryer from the bathroom into their own dedicated laundry space will allow us to enlarge the bathroom, while the kitchen will get a complete overhaul with added cabinets, an island, and a breakfast bar.

With the cost of doing the other half of the house, we should be done… oh, in another 20 years or so. >.< But at least we’ll have a house we like and it will be much more attractive and modern, and easier to sell someday!

Bedroom Renovation - Part 1 | Our Prairie Nest
Bedroom Renovations: Part 1

It’s almost done! O frabjous day! With so much awful front-page news – which is how it should be, and I hope all of you are well – it feels good to find happiness in one’s own nest.

As always, here’s a summary of how we got from there to here: my husband’s Air Force enlistment ended in 2013. We moved back to the United States and purchased a super cheap house with the intention of taking it from musty to modern. The first task was to build a workshop to house tools and provide a space to work. The second task was to renovate our living room. Both the workshop and the living room are here.

The front two bedrooms and hallway came next. We’d already ripped out the carpeting in the hall and first bedroom, which left us with only subfloor for a few years. Needless to say, we’ve all suffered our share of foot splinters. Last week, however, the hardwood floors went in and we’re enjoying the fresh, new, splinter-free texture beneath our feet!

So let’s dial it back to the beginning. With the living room complete as of Spring of 2019, we started on the bedrooms in the fall. WHY do we always gut a room right before it gets cold, and then have to block the uninsulated portion of our house off with heavy-duty plastic? I don’t know, but apparently that’s just how we roll.

Here are the “before” pictures. The first bedroom was already partially done (we’d already hung drywall on one wall of it) and partially destroyed (carpeting gone, subfloor visible) at the same time. This picture was taken through where the wall used to be.

The other bedroom is the master bedroom and this is what we started out with.

Fancy, aren’t they? Why would we want to renovate any of this? This is after my husband removed the edges of the so-called closet. Let the gutting begin!

We rented a dumpster, and started by ripping out the wall separating the rooms. Then we ripped out the ceilings. Check out our vintage insulation! It goes back to 1977. So does this piece of a 45 we found inside one of the walls.

“Undercover Angel” by Alan O’Day, 1977.

Once we pulled out the insulation and the old wiring, we were in business. My husband added new framing between the bedrooms. In doing so, he also changed the layout. Originally, there was an alcove for a dryer that jutted into the first bedroom, and then the bedroom doors faced each other. We purchased a stackable washer/dryer set, with the intention of making this change. The new layout places both bedrooms’ doors in the hall proper, adding more square footage to each bedroom.

The drywall you see here was added when we put drywall in our living room, a few years prior.

He then installed new wiring and recessed lighting cans. The first bedroom had a single ceiling fixture. The master bedroom had two. Both were pretty darn outdated, as you can see from the photo of the master bedroom before we gutted it. Then, we added modern insulation for both the ceiling (unfaced R30) and walls (faced R13). It’s amazing what a difference bringing the insulation up to today’s standards makes.

Many people ask just how far we go when renovating a room. We go all the way – gutting it from the ceiling joists to the studs to the subfloor. Each step takes varying amounts of time depending on the money we have available to move forward and how time-intensive a particular aspect is.

Once all of that work is done, the fun can really begin… in part 2!

Canning Pickles | Our Prairie Nest
Pickles & Breadcrumbs
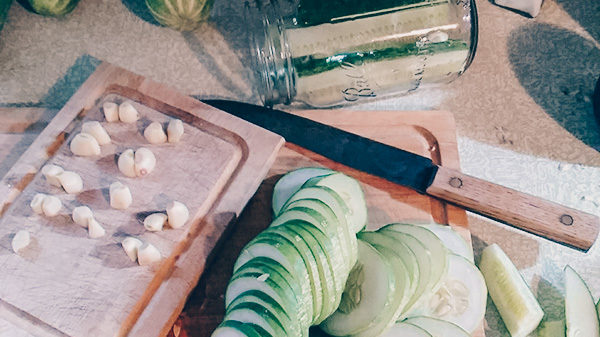
No, pickles and bread crumbs don’t go together… unless you’re making them!

Last week, we did our first canning of the season. Year after year, we enjoy a bountiful cucumber harvest. The right ones go into pickles. Which cucumbers are best for pickles? You want the smaller cukes, the ones with smaller seeds. They should be just ripe. An overripe cucumber doesn’t make as nice a pickle.

Making Pickles

There are several ways to make pickles. The first couple of years, we went with the heat canning and boiling the jars, but last year we discovered an easier and tastier way to make pickles – no heat, no boiling, and the result are even more flavorful, crunchy pickles.

If this sounds intriguing to you, you want to go with cold process. There are several recipes available with different ways of spicing the pickles, but most come down to the same technique: you clean the cucumbers and jars, mix your spices, boil your brine, slice your cucumbers, add garlic, and then the brine and spices. Let them sit for a few days and then give them a try.

Making Breadcrumbs

The other thing we did last week was make homemade breadcrumbs for the first time. With all the grilling we do during the summer, the top of the refrigerator becomes a sort of catch-all for hamburger and hot dog buns. I don’t like throwing away the leftovers and I also don’t want to feed leftover pieces to the birds and ducks. It’s just not good for them or the environment. So I finally put the leftovers to good use.

Breadcrumbs are easy to make. I tore the buns into small pieces and put them on a foil-lined baking tray. Then, I placed them in the oven at 350 degrees. I checked on them every 10 minutes, mixing the bread until it’d all gone nice and dry.

If you aren’t sure you can remember to check in consistently, because you don’t want the bread to burn, you can dry it at lower temperatures for a longer amount of time. When a few pieces still felt a little soft, I turned the oven off and just let the tray sit for another 10 minutes.

Most recipes call for a food processor for the next step, which we don’t have (that and a mixer are both on my wishlist. Someday!), but a blender works just fine. I filled the blender about halfway with dried pieces of bread and used the ice crushing setting to break them down into breadcrumbs.

Then I experimented with my next batch by throwing in a combination of kosher salt, oregano, basil, and parsley. I kept the spices to a minimum, but probably could have been more generous with the amounts. This batch of breadcrumbs came out smelling delicious and I plan to make them in the future with slightly stronger seasoning.

That is, if cooking with them turns out well. I’ll try to remember to report on that!

*Edited to add: Cooking with them was amazing! Just as good, if not better than, store-bought breadcrumbs.

Bread Crumbs | Our Prairie Nest

Garden 2018

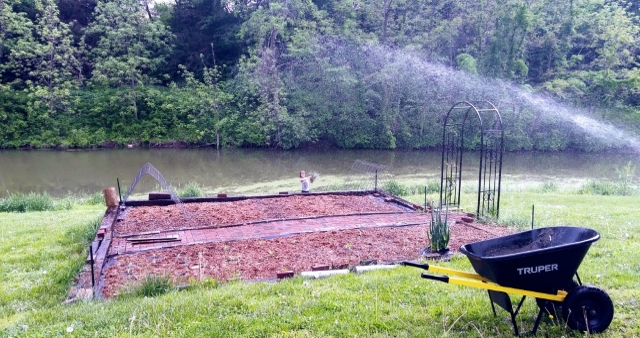
The time has come. The garden is planted.

We have the usual suspects this year:

  • Zucchini
  • Butternut squash
  • Green beans
  • Cucumbers
  • Cantalope
  • Cauliflower
  • Tomatoes
  • Chili peppers
  • Green pepers
  • Corn
  • Peas
  • Watermelon

In containers on the back porch, we have cilantro, basil, and some shallots. The raspberries and strawberries are already working their way back.

Every year we plant our garden and we’re always glad we did. It took some work to get it to this point. It wasn’t quite as large the first year or decorative the second year. But after expanding it to 20×20, we added the path and archway. Clematis grows up the archway and we also have lavender on either side. Soon, we’ll add marigolds to the garden in a few empty areas.

This was the one year we didn’t make any major changes to the garden. I would, however, like to build cold frames. I’m not sure if they will happen this year, because home renovation has been our main priority. We spent the last two years building a workshop on our property. I’m really glad we’ve turned our attention to the house, now, so further garden improvements might be on hold for the time being.

It’s strange to think this garden will be completely green in a month or so. Every year, we rotate where we plant the veggies. Never the same area two years in a row! Mind you, I’m not doing this scientifically. That is, I’m not saying, “Okay, since the corn was there last year, I need to follow-up with beans in the same spot this time.” I really just swap sides and ends of the garden for the plants, so they get rotated in a circle of sorts. The peas aren’t even going in the garden this year. We think they don’t like so much direct sunlight, so they’re closer to the house, where there’s partial shade.

The nice thing about living in the same place for five years is you learn what works and what doesn’t.